Keycloak
To integrate Keycloak with AI/Run CodeMie, follow the steps below:
1. Configure Keycloak
1.1. In Keycloak select the realm which you want to manage.
1.2. Create a client or use an existing one (e.g., admin-cli).
1.3. Select the Integrations tab.
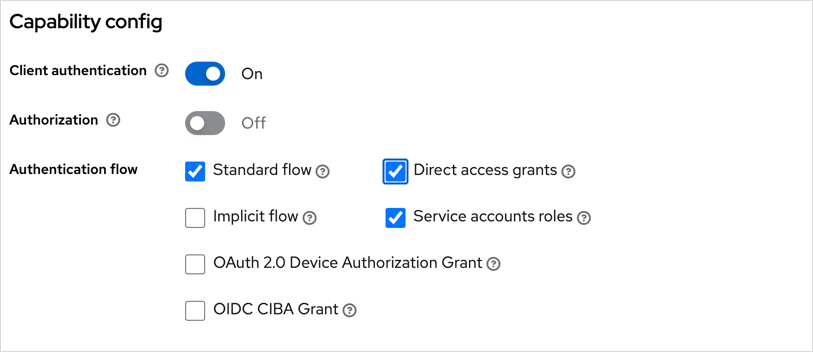
1.4. On the Integrations tab, navigate to the Capability config section and set the following parameters:
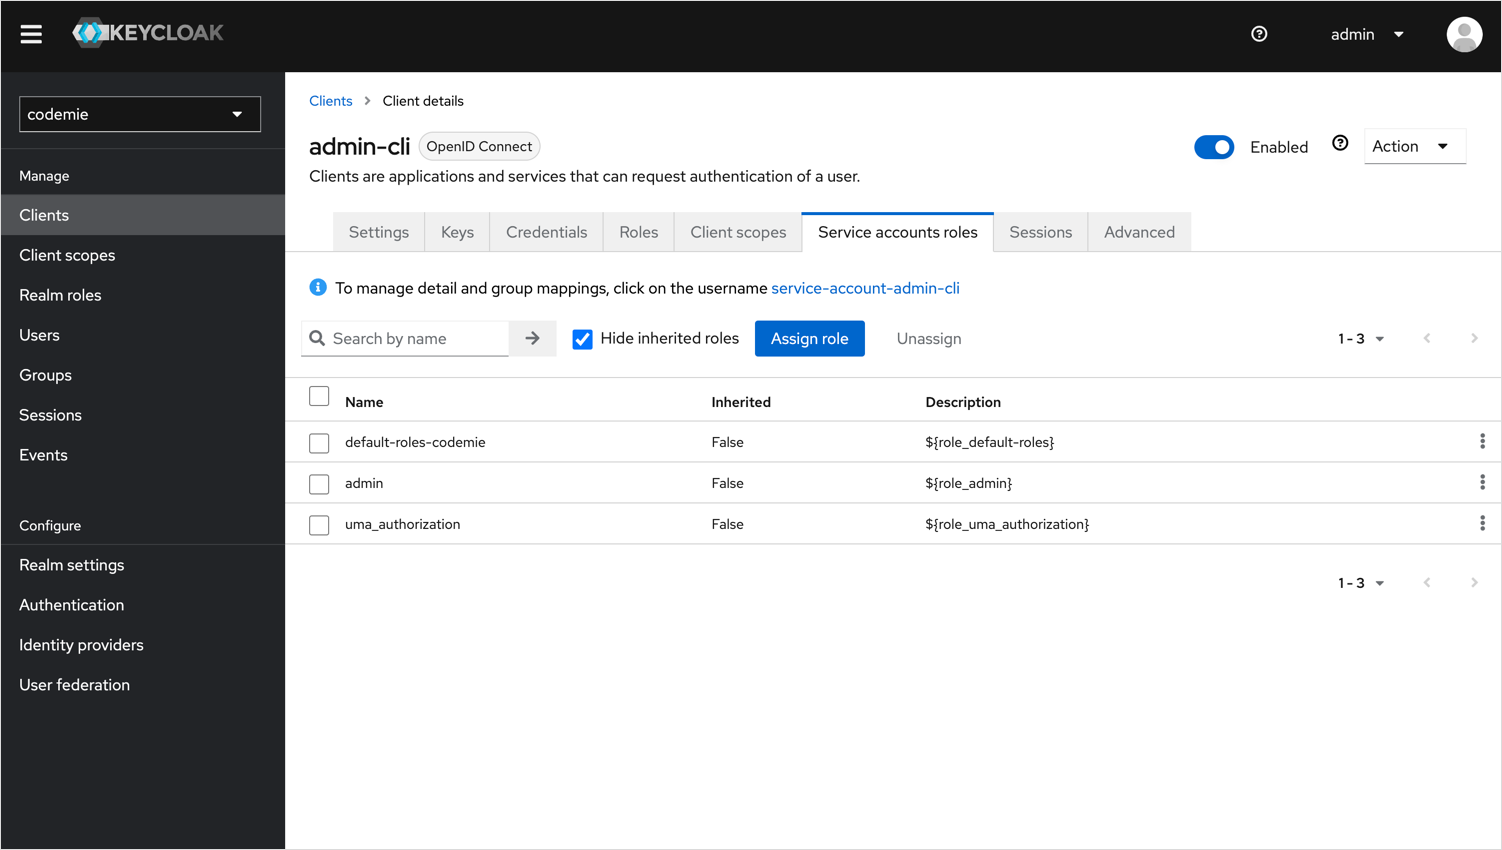
1.5. Select the Service accounts roles tab and click assign role, select role (e.g., admin) and click Assign.
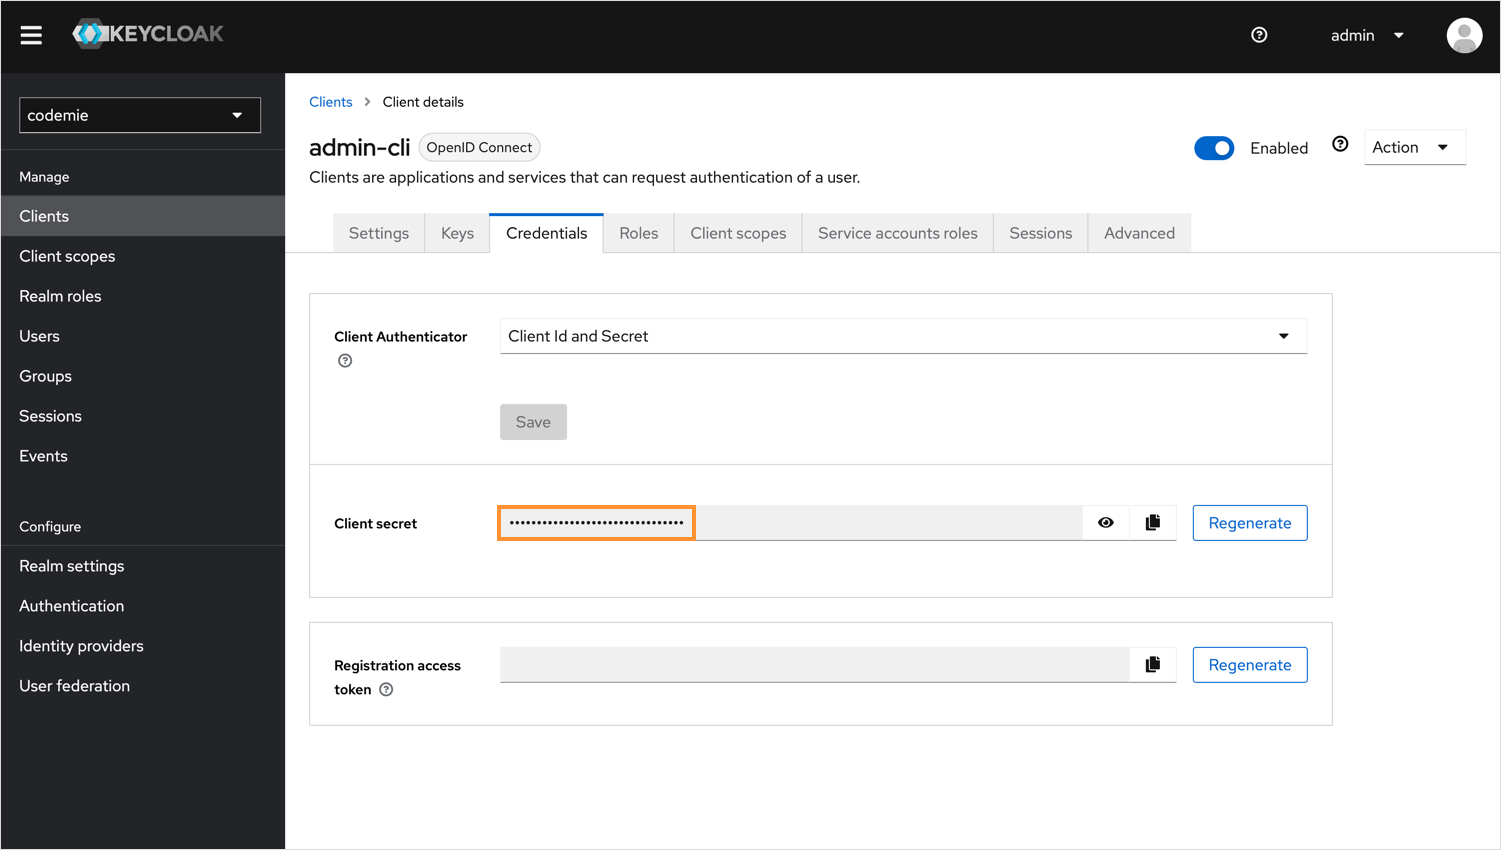
1.6. Select the Credentials tab and copy the Client secret.
2. Configure Integration in AI/Run CodeMie
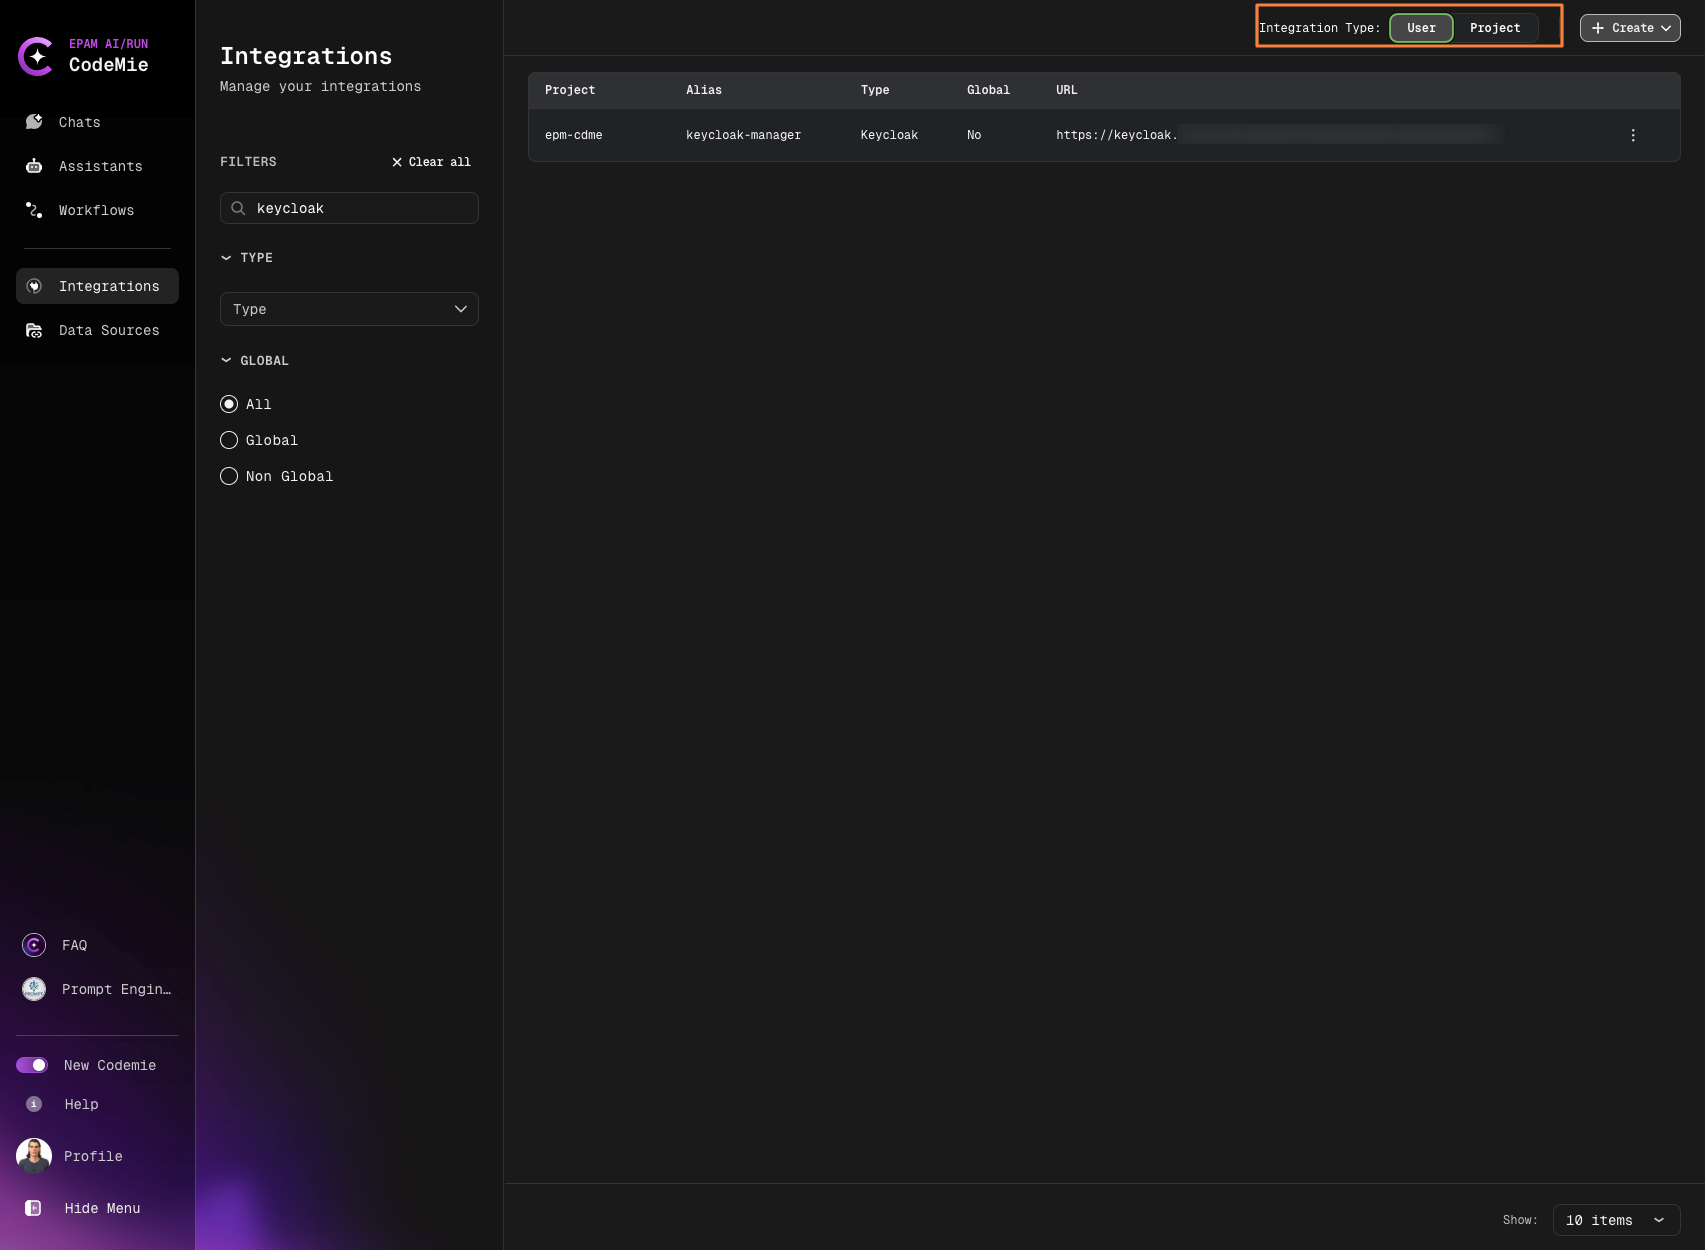
2.1. In the AI/Run CodeMie main menu, click the Integrations button.
2.2. Select User or Project (this functionality is available for Administrators and application admins only) and click the + Create button.
2.3. In the new user setting menu, fill in the following parameters:
- Project Name: Select the name of your project.
- Credential Type: Keycloak.
- Alias: Alias is a representation of the user setting (e.g., Keycloak).
- Keycloak Base URL: Fill in the URL field (e.g., https://keycloak.example.com/auth).
- Keycloak Realm: Fill in the Realm from step 1.
- Keycloak Client ID: Fill in the Client ID from step 1.2.
- Keycloak Client Secret: Fill in the Token field with the token created from step 1.6.
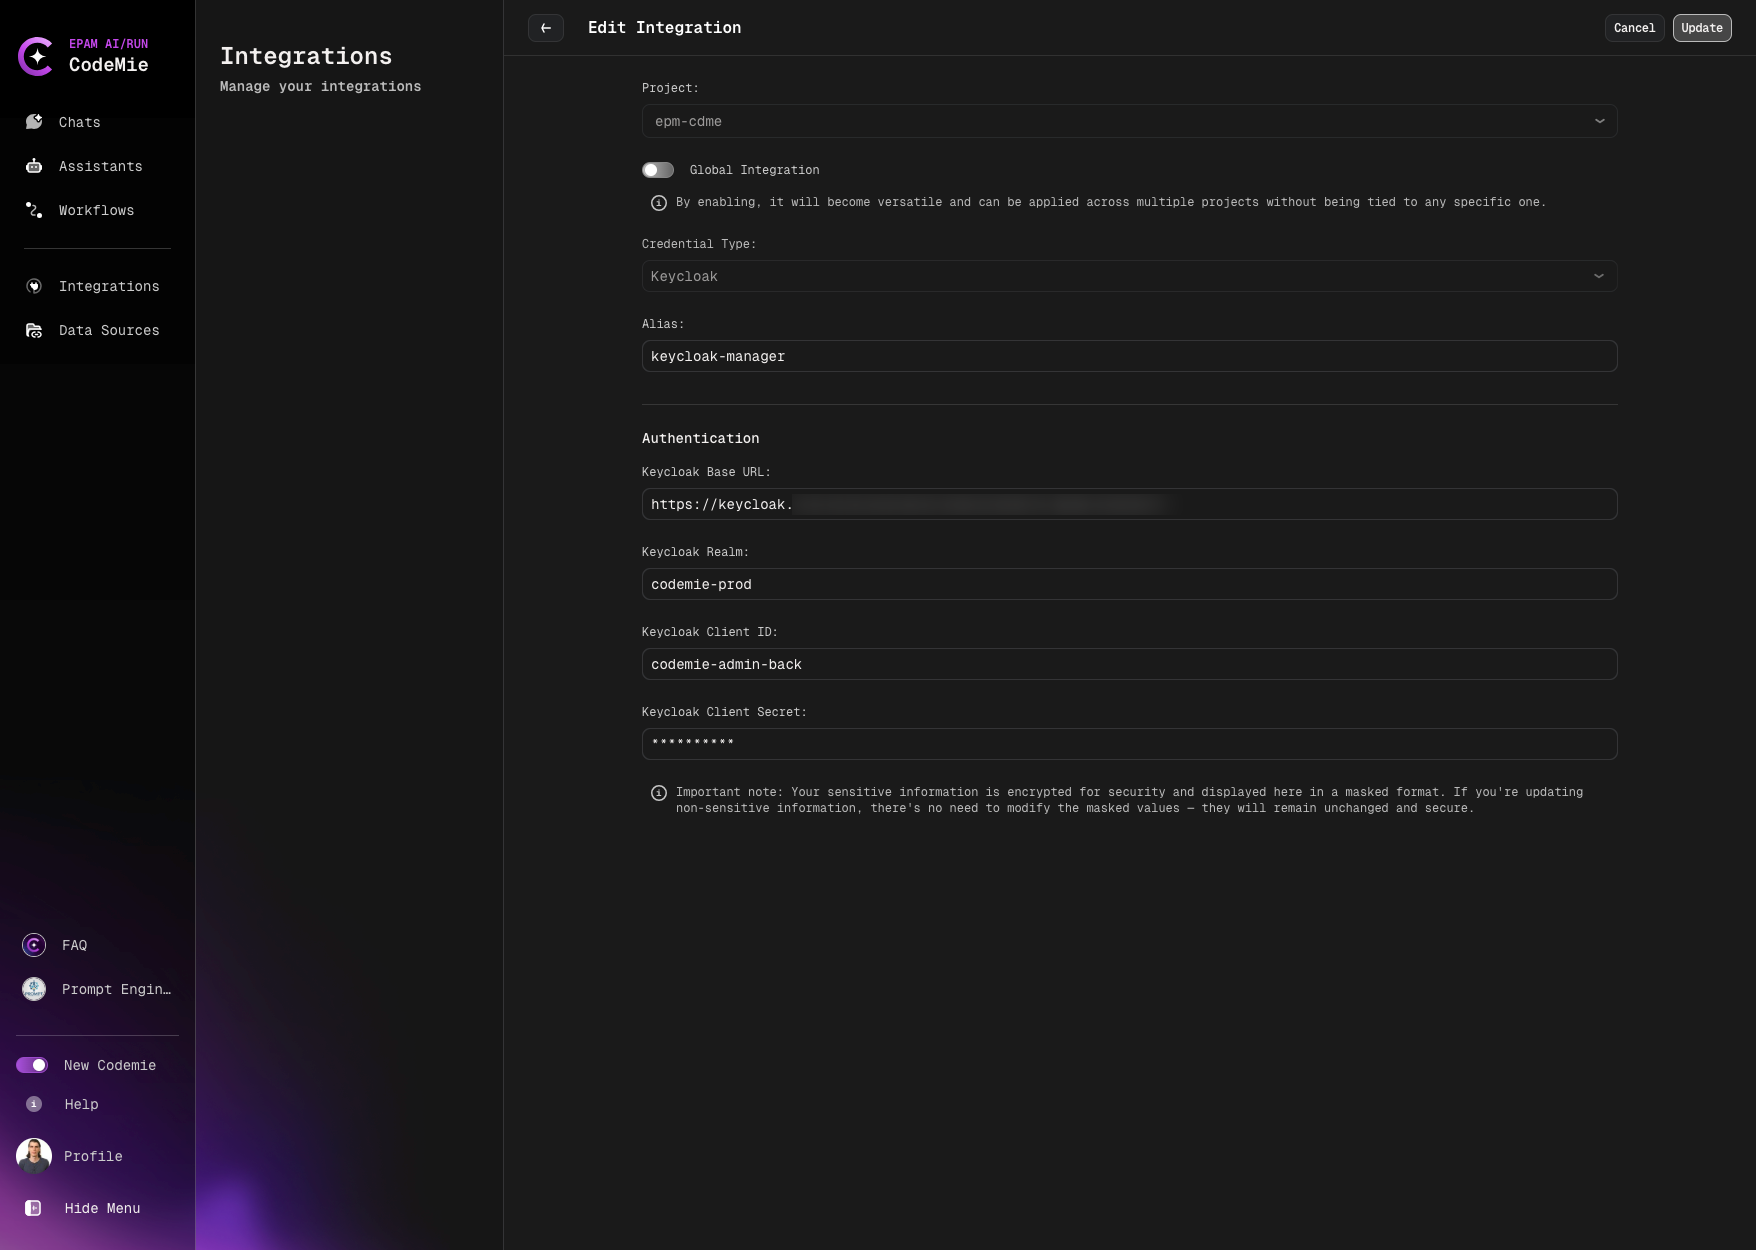
2.4. Click Create/Update.
3. Create Assistant with Keycloak Tool
3.1. Click Explore Assistant, Click Create Assistant and fill in the following parameters:
- Project Name: Select the name of your project.
- Name: Specify the assistant name.
- Description: Specify description.
- System Instructions: Specify system instructions.
- Available tools: Access Management, Keycloak and select from drop down menu alias of credentials from step 2.3.
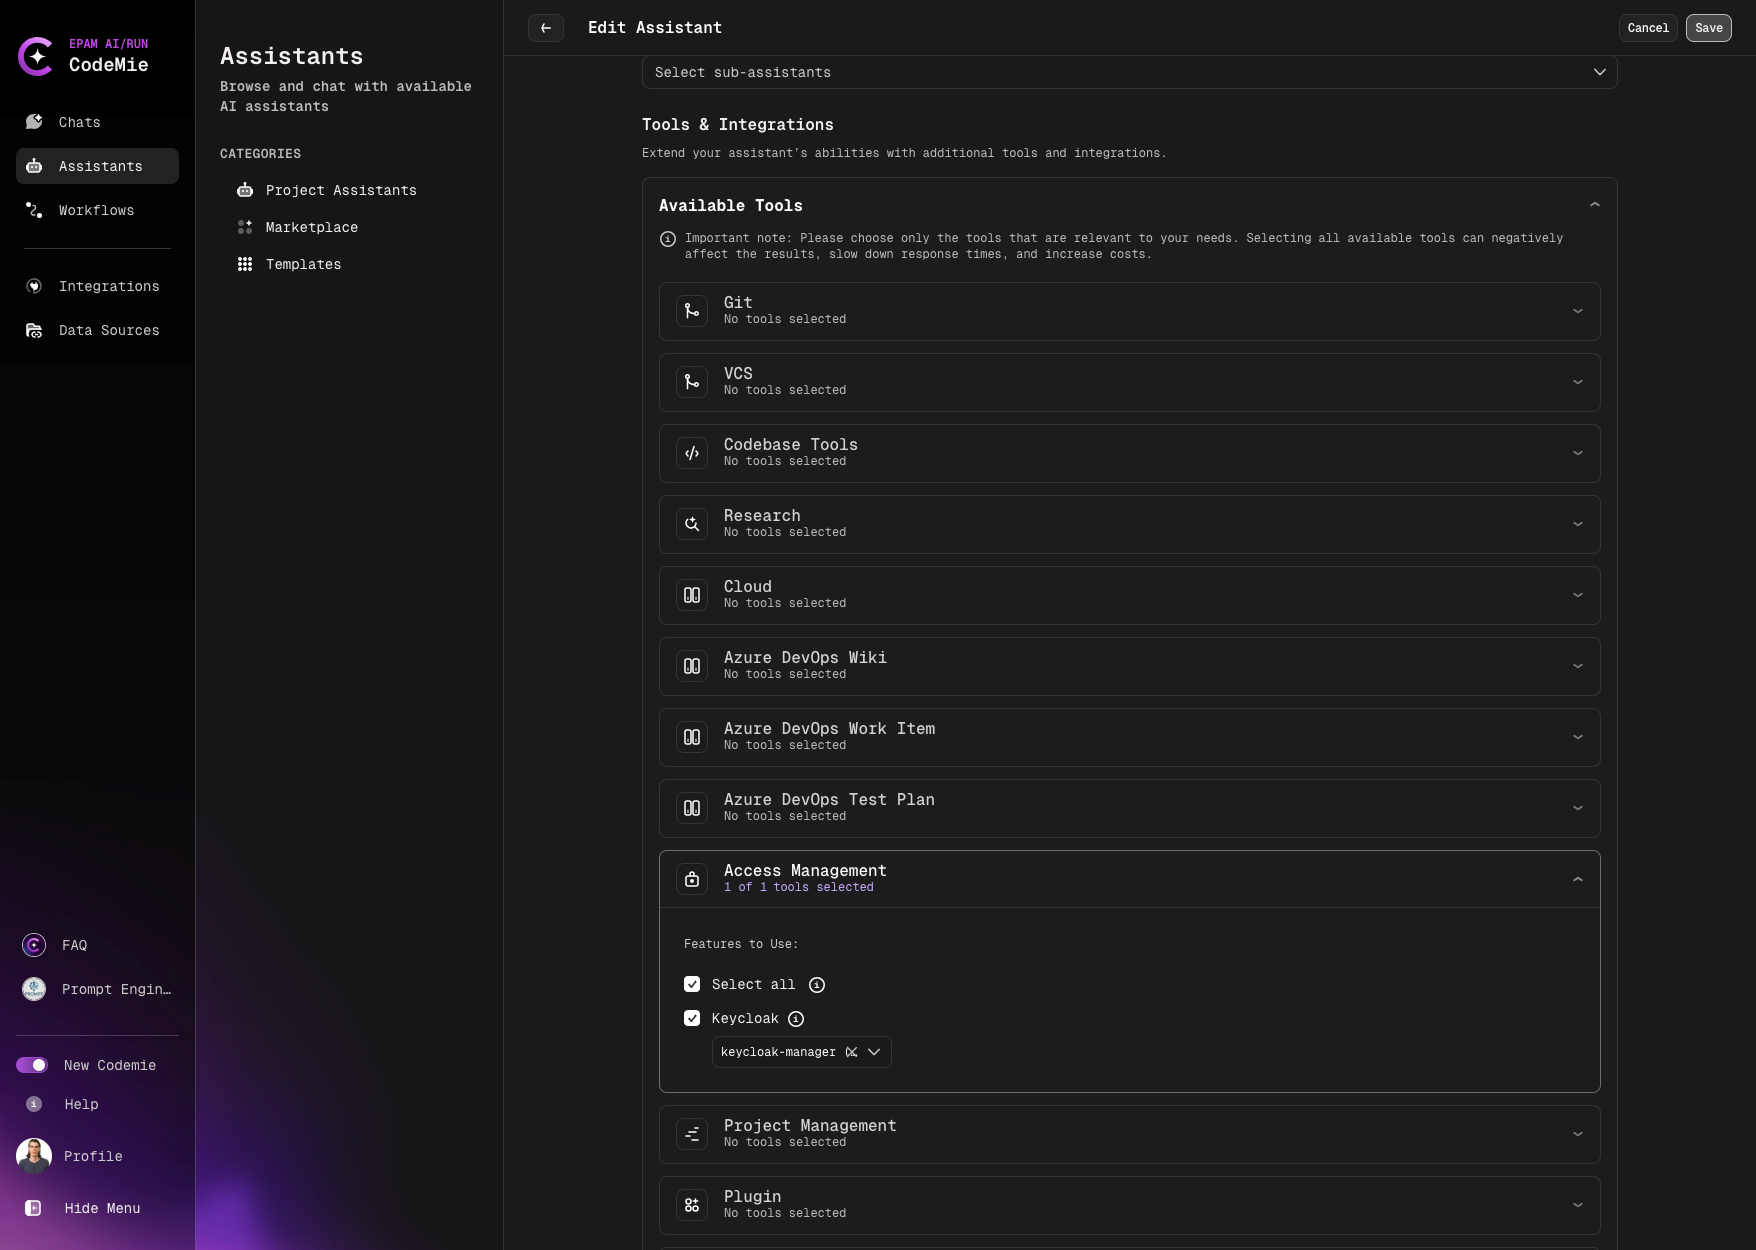
3.2. Click Create/Save.
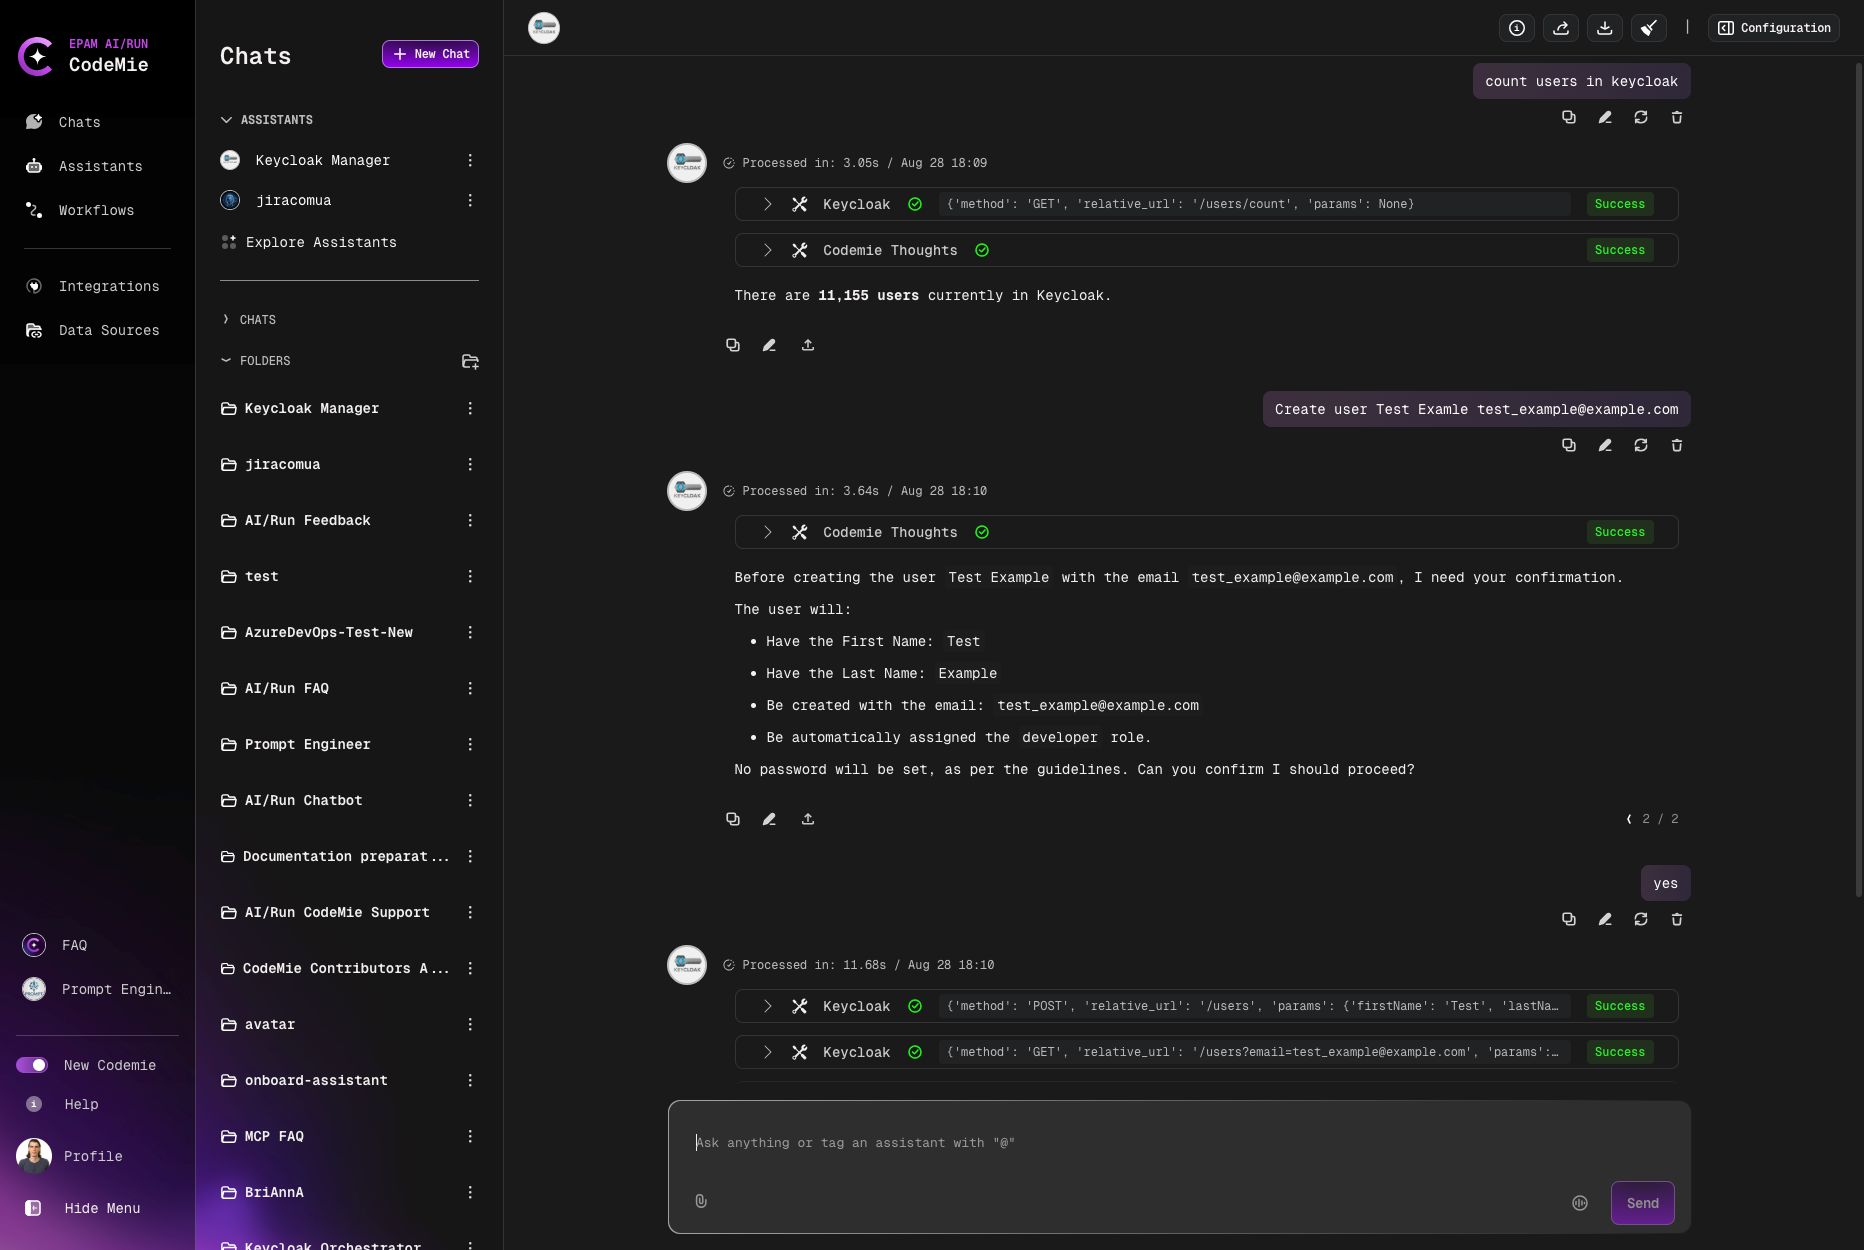
4. Use Your Assistant
4.1. Click Explore Assistant, select My Assistants and choose by Name your assistant. Enjoy!